Ultimate Resource for Evaluating and Repairing Damaged Travertine Tiles
Effective Techniques for Identifying Cracks and Surface Imperfections
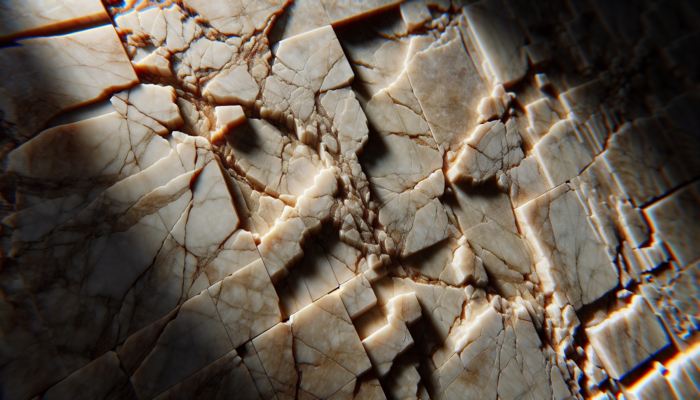
Conducting a thorough and detailed inspection of travertine tiles is critical to assess the possibility of repairing any cracked tiles within your residence. Start by closely scrutinizing the tiles for any noticeable cracks, chips, or surface irregularities. Utilizing an intense light source can significantly aid in uncovering flaws that might otherwise go unnoticed. Pay special attention to identifying chips, fissures, and other surface irregularities that may exist. Additionally, understanding where these cracks are located is crucial. Some may be surface-level and easier to repair, while others could indicate deeper, underlying issues that require a more informed approach for effective resolution.
In many households across Britain, particularly in regions experiencing drastic temperature fluctuations, travertine tiles are susceptible to cracking due to the natural expansion and contraction of the material. It is wise to focus on tiles near exterior walls, as moisture penetration can exacerbate damage over time. Understanding the full extent of the damage is essential, as it will direct your repair efforts and assist in determining whether a DIY method is feasible for your specific situation.
Recognizing Varied Types of Cracks Found in Travertine Tiles
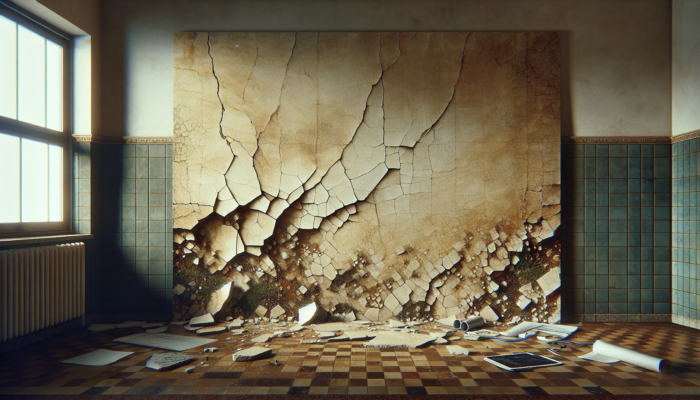
Cracks in travertine tiles manifest in different forms, mainly categorized into hairline, surface, and deep cracks. Hairline cracks are generally minor and typically do not compromise the structural integrity of the tile. These cracks can often be addressed with specialized fillers specifically formulated for travertine, making them excellent candidates for DIY repair projects.
Surface cracks may penetrate slightly deeper but can still be tackled at home with the proper tools and materials. It is vital to determine whether these surface cracks affect the overall aesthetics or functionality of the tile. Conversely, deep cracks may indicate significant underlying issues, such as improper installation techniques or critical structural concerns, which are best managed by professionals. Understanding the type of crack present will greatly assist in deciding on the most effective repair strategy tailored to your unique circumstances.
Ensuring Safety While Performing Travertine Tile Repair Tasks
Prioritizing safety is essential before starting any repair work. Equip yourself with appropriate protective gear, including safety goggles, gloves, and a dust mask to shield against sharp debris or harmful dust generated during the repair process. Since travertine tiles can be quite heavy, broken pieces may pose a significant injury risk; therefore, exercise extreme caution when lifting or handling them.
Furthermore, it is advisable to work in a well-ventilated environment to prevent inhaling fumes from adhesives or fillers. When utilizing power tools, ensure they are in excellent working condition and adhere to all manufacturer safety guidelines. This not only protects you during the repair process but also fosters a safer atmosphere for anyone else in your home, ensuring a smooth and efficient repair experience.
Assessing the Structural Stability of Your Travertine Tiles
Evaluating the structural integrity of your travertine tiles is a vital aspect of your repair process. If you observe extensive cracking or if the tiles feel unstable when walked upon, this may indicate a more serious underlying issue. Look for tiles that feel loose or sections that may have shifted, as these signs can point to foundational problems requiring professional evaluation for effective resolution.
Additionally, it is crucial to inspect the underlying substrate; if the underlayment is compromised, it could lead to further damage in the future. If you suspect that the cracks are merely a symptom of a larger issue, do not hesitate to consult a professional before attempting any repairs. Understanding your tiles’ structural integrity is essential in confidently considering the question: Can cracked travertine tiles be repaired at home?
Essential Tools and Materials for Successful Travertine Tile Repair
Gathering Necessary Tools to Ensure Effective Travertine Tile Repairs
Initiating a successful travertine tile repair project requires the right tools to achieve optimal results. Key tools include a grout saw for effectively removing old grout surrounding the damaged area, a trowel for spreading filler, and a utility knife for executing precise cutting tasks. Moreover, having safety goggles readily on hand is essential for protecting your eyes from dust and debris throughout the repair process.
A vacuum or soft brush is also invaluable for cleaning the tiles before and after repairs, ensuring that the surface is smooth and ready for the application of repair materials. If dealing with deeper cracks, consider using chisels or a hammer to carefully chip away damaged sections of the tile. Having these essential tools at your disposal will streamline your repair process, enhancing efficiency and allowing you to confidently address the question, “Can cracked travertine tiles be repaired at home?”
Selecting High-Quality Materials for Effective Travertine Tile Repairs

Choosing the right repair materials is crucial for achieving a durable and visually appealing finish for your travertine tiles. Travertine fillers, usually epoxy-based, are ideal for effectively filling cracks, especially those that are larger or more substantial. These fillers are specifically formulated for natural stone and will adhere effectively to the travertine surface, ensuring a strong bond.
A simple resin filler is also highly effective for addressing minor hairline cracks. Additionally, if you need to replace any damaged tiles, you will require a suitable adhesive. It’s essential to ensure that the materials you select are compatible with travertine and appropriate for indoor use, particularly in moisture-prone areas such as kitchens or bathrooms. This careful selection of materials is integral to achieving a successful repair that will withstand the test of time.
Where to Find Essential Supplies for Travertine Tile Repairs
Many suppliers across the UK offer the necessary tools and materials for travertine tile repairs. DIY stores such as B&Q, Homebase, and Screwfix provide a broad selection of options tailored to your needs. Additionally, specialized stone supply companies often carry high-quality fillers and adhesives specifically designed for stone restoration requirements. Online marketplaces, like Amazon, can also be a convenient option, allowing you to compare products and read customer reviews prior to making a purchase.
Your local tile suppliers may provide tailored recommendations for your project, so do not hesitate to seek their expert advice on the best products for your needs. Sourcing your materials wisely can significantly enhance the likelihood of a successful and satisfactory repair process, ultimately ensuring your travertine tiles remain in excellent condition.
Thoroughly Preparing the Surface for Successful Repairs
Performing a Comprehensive Cleaning of the Travertine Tiles
Before initiating repairs, it is essential to meticulously clean the tiles to ensure proper adhesion of fillers and adhesives. Start by sweeping the area to eliminate surface dust and debris. Follow this by mopping with a damp cloth, utilizing a gentle cleaning solution specifically designed for stone, as harsh chemicals can cause irreversible damage to travertine tiles.
This step is vital to ensure that the tiles dry completely after cleaning. Any moisture remaining on the surface can interfere with the repair materials, potentially leading to unsatisfactory results. A clean and dry surface not only enhances the effectiveness of the repair but also promotes a more seamless finish, reinforcing the query of whether cracked travertine tiles can be repaired at home.
Carefully Eliminating Old Grout for Successful Repairs
To ensure effective repairs, it is crucial to meticulously remove the old grout surrounding the damaged area. Utilizing a grout saw or a utility knife, carefully scrape out the old grout without causing damage to the surrounding tiles. Take your time and work methodically; rushing through this process can lead to further damage or uneven edges that detract from the overall results.
After removing the old grout, vacuum the area to eliminate any residual debris. This preparation step is essential for ensuring that the new grout will adhere properly, providing a strong bond and significantly improving the appearance of the repaired area. Properly preparing the surface lays the groundwork for a successful travertine tile repair project, ensuring lasting results.
Confirming the Surface is Completely Dry Before Continuing with Repairs
Once the tiles are clean and the old grout has been removed, it is crucial to ensure that the surface is entirely dry before proceeding with repairs. Any residual moisture can compromise the integrity of the repair materials, resulting in bubbling or peeling. This drying process may take several hours or longer, depending on humidity levels and ventilation.
Consider using a fan to expedite the drying process, particularly in enclosed spaces. A thoroughly dried surface not only facilitates better adhesion but also increases the longevity of the repairs, making it a vital consideration in your DIY journey to restore your travertine tiles.
Conducting a Thorough Damage Assessment Prior to Repairs
Before moving forward with repairs, conduct a comprehensive assessment of the tiles. Look for any additional cracks, chips, or signs of wear that may not have been immediately apparent. Additionally, pay close attention to the condition of grout lines, as these can indicate potential water damage or instability in the structure.
Identifying any further damage early on allows you to address these issues efficiently, preventing them from worsening over time. If you uncover extensive damage or underlying structural concerns, it may be wise to consult with a professional before proceeding with repairs. This proactive approach ensures that your efforts to address the question, “Can cracked travertine tiles be repaired at home?” are worthwhile, ultimately safeguarding your investment.
Effective Repair Strategies for Minor Cracks in Travertine Tiles
Filling Hairline Cracks with Precision and Care for Optimal Results
Hairline cracks must be thoroughly evaluated to determine whether they are likely to result in further damage. If there is a risk of additional damage, these hairline cracks may need to be widened using diamond tooling, allowing for effective repair with a filler specifically designed for travertine.
For the best results, follow the manufacturer’s instructions regarding the filler product, which may specify particular application techniques or drying times. After filling, use a damp cloth to gently wipe away any excess filler around the edges of the crack, ensuring a smooth and professional finish. This attention to detail enhances the appearance of the repaired area and strengthens the integrity of the tile.
Smoothing the Repaired Surface for a Perfect Finish
Once the filler has dried according to the manufacturer’s recommendations, it’s time to smooth the surface for a flawless finish. Utilize fine-grit sandpaper or a sanding block to gently sand the repaired area until it aligns perfectly with the surrounding tile surface. This step is crucial; an uneven finish can be visually distracting and detract from the overall aesthetic of your travertine tiles.
Exercise caution during this process, as excessive sanding can damage the adjacent tiles. After sanding, thoroughly clean the area to remove any dust particles generated during the process. This careful approach ensures that the repaired area seamlessly blends with the original surface, significantly enhancing the visual appeal and durability of your travertine tiles.
Understanding the Importance of Allowing Adequate Drying Time
Recognizing the drying time for various filler types is essential for successful repairs. Most travertine fillers have specific drying times outlined in their product instructions, typically ranging from a few hours to 24 hours. Adhering to these recommendations is crucial, allowing the filler sufficient time to cure before exposing it to foot traffic or moisture.
Patience during this phase is vital; rushing the process can lead to unsatisfactory outcomes, with the risk of the filler cracking or peeling away. For optimal results, ensure that the environment is well-ventilated, as this can also help to expedite drying times. A properly cured filler guarantees a durable and long-lasting repair, making it a key consideration in your DIY repair project.
Effectively Addressing Major Cracks in Travertine Tiles
Chipping Out Damaged Areas with Precision and Care
When dealing with significant cracks in travertine tiles, the initial step typically involves carefully chipping out the damaged areas. Begin by assessing the extent of the damage using a chisel or utility knife. Gently chip away the damaged section, being mindful to avoid harming the surrounding tiles. This method creates a clean area for applying epoxy or filler effectively.
Once the damaged area is removed, thoroughly clean the site to ensure a good bond with the repair materials. Confirm that no loose pieces or debris remain, as these can impact the adhesion of the epoxy. After adequately preparing the area, you can confidently proceed with the subsequent steps of your repair process while keeping in mind the question of whether cracked travertine tiles can be repaired at home.
Applying Epoxy for Larger Cracks with Confidence and Skill
Epoxy is the ideal repair material for larger cracks or damaged areas. Mixing epoxy involves combining a resin with a hardener, so closely adhering to the manufacturer’s guidelines is critical for optimal results. After mixing, use a putty knife to apply the epoxy to the damaged area, ensuring it fills the space completely and adheres to the edges of the surrounding tiles.
Working quickly is crucial, as epoxy has a limited working time before it begins to cure. Once applied, smooth the epoxy’s surface to match the surrounding tile. Be diligent about cleaning any excess epoxy around the edges before it hardens, as this will create a significantly cleaner and more visually appealing final finish.
Adding Finishing Touches for a Polished and Professional Appearance
After the epoxy has cured according to the manufacturer’s instructions, it’s time to apply the finishing touches. Gently sand the cured epoxy to blend it seamlessly with the surface of the surrounding travertine tiles. This process may require fine-grit sandpaper to achieve a smooth and uniform finish that enhances the overall look.
Additionally, consider applying a suitable sealer over the repaired area to protect against moisture and stains. Sealing is an essential final step for travertine tiles, particularly in high-traffic areas or locations exposed to water, such as kitchens and bathrooms. Completing these finishing touches enhances the repair’s durability and ensures your tiles maintain their aesthetic appeal over time, making them look as good as new.
Curing the Epoxy for Durable and Long-lasting Repairs
Properly curing epoxy is vital for ensuring a durable repair. Epoxy can take anywhere from a few hours to several days to fully cure, depending on environmental conditions and the specific product used. It is crucial to closely follow the manufacturer’s guidelines regarding curing times to ensure optimal results.
During this curing period, avoid exposing the repaired area to water or heavy foot traffic, as this can compromise the integrity of the repair. A successful curing process will result in a robust bond that restores your travertine tiles’ functionality and appearance, making this step a vital part of the repair journey.
Re-grouting and Sealing Travertine Tiles for Enhanced Longevity and Protection
Selecting the Right Grout for Travertine Tile Applications
Re-grouting is a crucial step following any repair, particularly for areas where the grout has been disturbed or removed. Choosing the correct type of grout for travertine tiles is vital for achieving a successful outcome. Latex or epoxy-based grout is often recommended due to its durability and resistance to moisture; these properties make it ideal for high-traffic areas and locations exposed to water.
Consider the grout’s color as well; finding a shade that closely matches the existing grout will help maintain a uniform appearance across your tiles. Consult with local suppliers or DIY stores for recommendations suited to your specific needs, ensuring that the selected grout is suitable for use with travertine tiles.
Applying New Grout with Care and Precision for Optimal Results
Once you’ve selected the appropriate grout, it’s time to apply it effectively. Using a grout float, gently press the grout into the joints between tiles, ensuring no air pockets are present. Work methodically, filling in any gaps and smoothing the surface for a clean and professional finish that enhances the overall look of your tiled area. After application, utilize a damp sponge to wipe away excess grout from the tile surfaces, taking care to avoid disturbing the freshly applied grout in the joints.
Allow the grout to cure according to the manufacturer’s recommendations, typically 24 to 48 hours. During this curing period, avoid exposing the area to water or heavy foot traffic, as this can disrupt the curing process and compromise the effectiveness of the grout. Properly applied grout not only enhances the appearance of your tiles but also plays a crucial role in sealing them against moisture damage, ensuring their longevity.
Effectively Sealing Your Travertine Tiles for Long-lasting Protection
Sealing your travertine tiles after repair is of utmost importance for preventing future damage. A high-quality sealer acts as a protective barrier against moisture, stains, and dirt, prolonging the lifespan of your tiles. It is advisable to select a penetrating sealer specifically formulated for natural stone, as these provide optimal protection without altering the natural appearance of the travertine.
Before applying the sealer, ensure that the grout has fully cured and the tiles are clean and dry. Apply the sealer using a soft cloth or a roller, strictly adhering to the manufacturer’s instructions. Once applied, allow the sealer to cure as directed, typically for at least 24 hours, before allowing foot traffic in the area. This final sealing step ensures your travertine tiles remain beautiful and durable for many years to come, safeguarding your investment.
Recognizing When to Seek Professional Assistance for Travertine Tile Repairs
Identifying Scenarios Where DIY Repairs May Fall Short
While many repairs can be undertaken at home, certain situations necessitate professional help. Major structural damage, extensive cracking, or issues related to the substrate beneath the tiles are clear signs that a DIY approach may not be adequate. If you notice significant movement in tiles or if cracks reappear shortly after a repair, it is advisable to consult a professional.
Moreover, if you are unfamiliar with the necessary materials or techniques, seeking expert assistance can save both time and money in the long run. Recognizing when to call on professionals is essential to ensuring the longevity and durability of your <a href="https://tilecleaningsurrey.co.uk/home-garden/cleaning-travertine-surfaces-a-complete-uk-guide/">travertine surfaces</a>, ultimately protecting your investment.
Finding a Qualified Expert for Travertine Repairs
When searching for professional assistance, it is crucial to locate a qualified travertine repair specialist in Surrey. Fabritec Tile Cleaning stands out as an excellent choice, providing exceptional service and results that meet and exceed expectations.
Understanding Cost Variables Associated with Professional Repairs
It is essential for homeowners to gain insight into the costs associated with professional travertine repairs. Prices can vary widely based on the extent of the damage, the materials required, and the region in which you reside. Generally, minor repairs may range from £50 to £150, while extensive work can escalate into the hundreds or even thousands of pounds.
Requesting quotes from multiple professionals will provide you with a clearer understanding of expected costs. Be sure to inquire about a detailed breakdown, including labor and materials, to avoid unexpected expenses. Being informed will empower you to make the best decisions regarding your travertine repair needs, ensuring a successful outcome.
Evaluating the Qualifications of Professional Repair Services
Before hiring a travertine repair specialist, it is important to evaluate their qualifications. Look for professionals who are members of recognized industry associations, as this often indicates a commitment to quality and ethical standards. Reviewing customer testimonials and feedback provides valuable insight into previous work and overall customer satisfaction.
Requesting a portfolio of completed projects can also help you assess their level of experience. A trustworthy professional will readily share their qualifications and examples of their work, ensuring you feel confident in your hiring decision and the quality of the repair services provided.
Preparing for a Professional Visit at Your Home
If you’ve opted to enlist the help of a professional, preparing for their visit is crucial for a smooth process. Clear the area surrounding the damaged tiles to facilitate easy access, and be ready to discuss the issues you’ve encountered, including any previous repair attempts.
Gather any relevant documentation, such as warranty information or previous inspections, to provide the specialist with a comprehensive understanding of the situation. This preparation not only aids the professional in diagnosing the problem but also ensures a more efficient repair process, allowing your travertine tiles to be restored beautifully and efficiently.
Addressing Frequently Asked Questions About Travertine Repairs
What Are the Main Causes of Cracks in Travertine Tiles?
Cracks in travertine tiles can result from various factors, including thermal expansion, moisture penetration, or improper installation techniques. External pressure or impact can also contribute to cracking over time, leading to significant damage if not addressed promptly.
Can I Use Any Filler for Repairing Travertine Tiles?
To ensure proper adhesion and longevity, fillers specifically designed for travertine repairs must be utilized. Epoxy or resin-based fillers are typically recommended for achieving the best results, providing a reliable and durable solution for your repair needs.
What Is the Expected Drying Time for Travertine Repair Materials?
Drying times can vary depending on the product used. Most fillers and epoxies may take several hours to 24 hours to dry completely, while grout can require up to 48 hours for full curing. Following the manufacturer’s guidelines is essential for optimal results.
Should I Seal My Travertine Tiles After Completing Repairs?
Yes, sealing your travertine tiles post-repair is highly advisable. A quality sealer protects against moisture, stains, and dirt, thereby prolonging the tiles’ lifespan and maintaining their overall appearance, ensuring they remain beautiful for years to come.
What Tools Are Necessary for Repairing Travertine Tiles?
Essential tools include a grout saw, trowel, putty knife, safety goggles, and a vacuum or soft brush for cleaning. For deeper repairs, chisels or hammers may also be required to ensure a thorough job, ensuring your repairs are effective and long-lasting.
How Can I Determine if I Need Professional Assistance?
If you notice extensive cracking or instability in the tiles or if previous repairs have failed, it’s advisable to consult a professional. They can assess underlying structural issues that may not be apparent, providing peace of mind and ensuring the integrity of your tiles.
Is It Possible to Repair Travertine Tiles Without Prior Experience?
While DIY enthusiasts can undertake many minor repairs, lacking experience can lead to unsatisfactory results. If unsure, consider seeking help from professionals to ensure the quality of work exceeds expectations and that your tiles are restored effectively.
What Is the Average Cost of Professional Travertine Repairs in the UK?
Costs for professional travertine repairs can vary widely based on the severity of the damage and the geographical location. Minor repairs might range from £50 to £150, while extensive work can exceed several hundred pounds, so budgeting accordingly is essential for homeowners.
How Can I Maintain My Travertine Tiles After Completing Repairs?
Regular cleaning with pH-neutral cleaners, avoiding harsh chemicals, and promptly addressing spills will help maintain your travertine tiles. Sealing every few years is also recommended for ongoing protection, ensuring your tiles remain in excellent condition for years to come.
Are There Specific Cleaning Products Formulated for Travertine Tiles?
Yes, it’s advisable to use cleaning solutions specifically designed for natural stone. These products are effective in cleaning without causing damage, preserving the integrity of your travertine tiles and ensuring they look their best.
The post Can Cracked Travertine Tiles Be Repaired at Home?: DIY Solutions appeared first on https://tilecleaningsurrey.co.uk
The Article Repairing Cracked Travertine Tiles: DIY Solutions at Home appeared first on https://fabritec.org
The Article DIY Solutions for Repairing Cracked Travertine Tiles Was Found On https://limitsofstrategy.com